The problem
Your upload chokes mid-stream and OBS starts dropping frames. The viewer sees frozen video. By the time you notice the red icon in the status bar, the damage is already done and you are scrambling to lower the bitrate manually while the show keeps running.
OBS does have an experimental Dynamic Bitrate option buried in Advanced output settings. It works, but it is opaque: no thresholds you can tune, no log of what it did, and nothing on screen to tell you the stream is in real trouble. Connection Manager is a more visible take on the same problem.
What it does
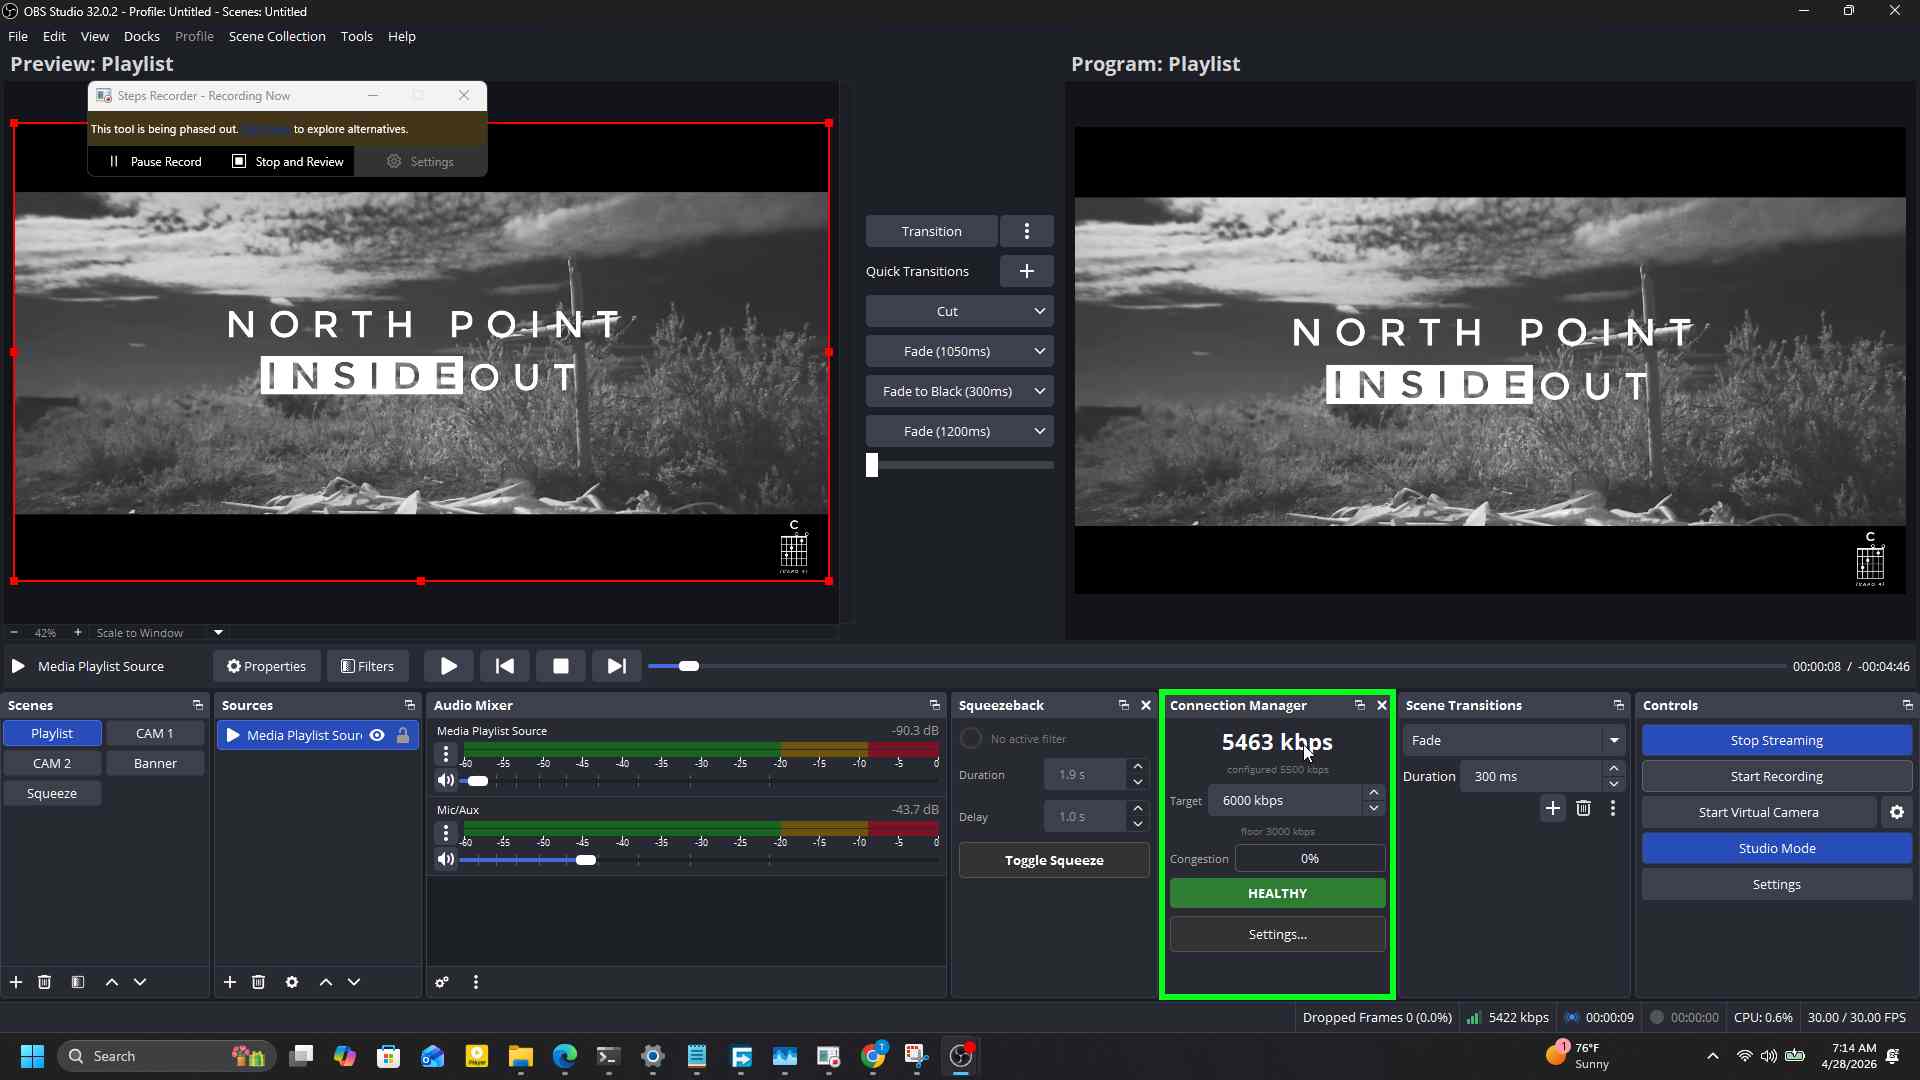
Connection Manager watches the streaming output’s congestion signal at 300 ms intervals. When congestion crosses a threshold, it steps the encoder bitrate down by a configurable amount. When the network has been quiet for long enough, it steps the bitrate back up toward your configured ceiling. A dock shows live throughput, the current congestion bar, and a state badge. If congestion stays critical and the bitrate is already at the floor, a red banner and a desktop toast fire so the operator notices.
How this differs from OBS Dynamic Bitrate
| Feature | OBS DBR | Connection Manager |
|---|---|---|
| Configurable thresholds | No | Yes |
| Operator alert when stream is breaking | No | Yes |
| Session log | No | Yes |
| Live editable target on dock | No | Yes |
Install
Windows only for now.
- Grab the latest installer from the releases page.
- Run it. The installer locates your OBS install and drops the plugin DLL and data files into place.
- Restart OBS.
- Open the dock from Docks > Connection Manager.
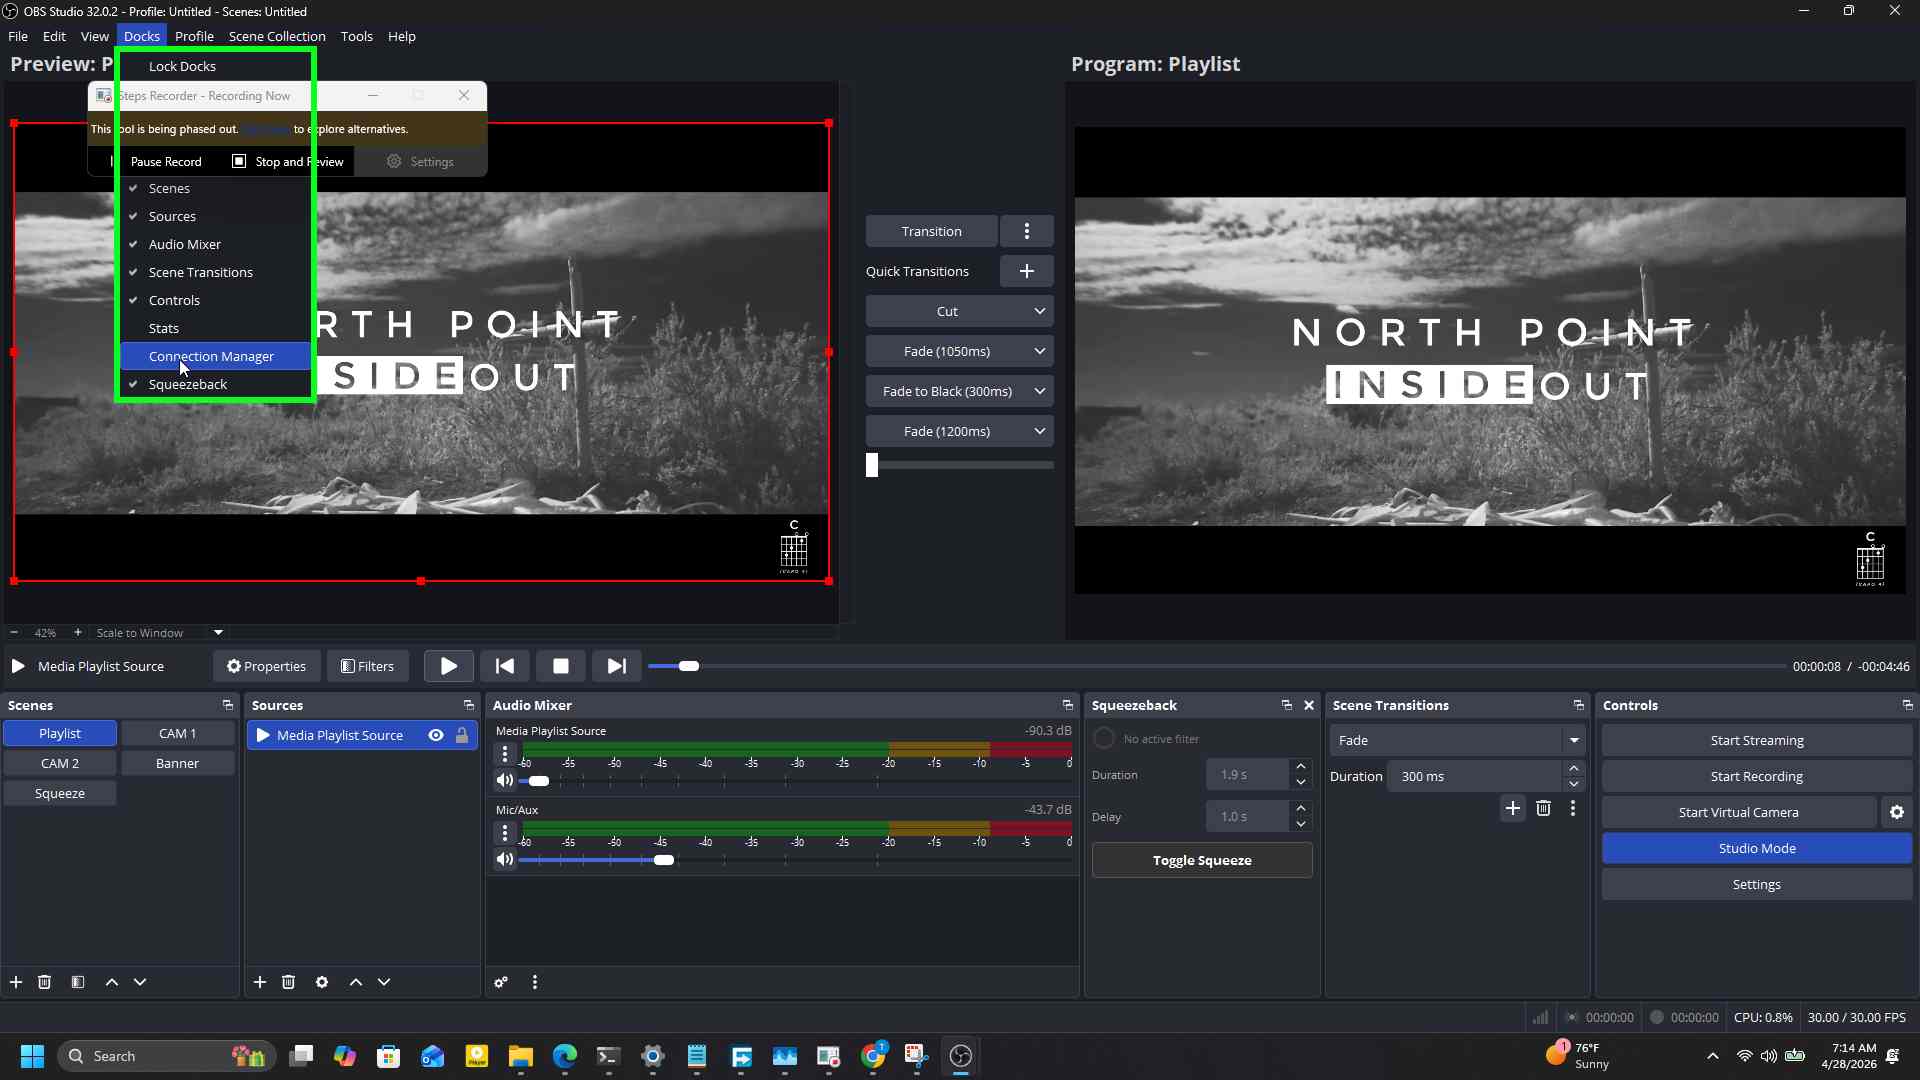
A tour of the dock
The dock is compact on purpose. Top-down:
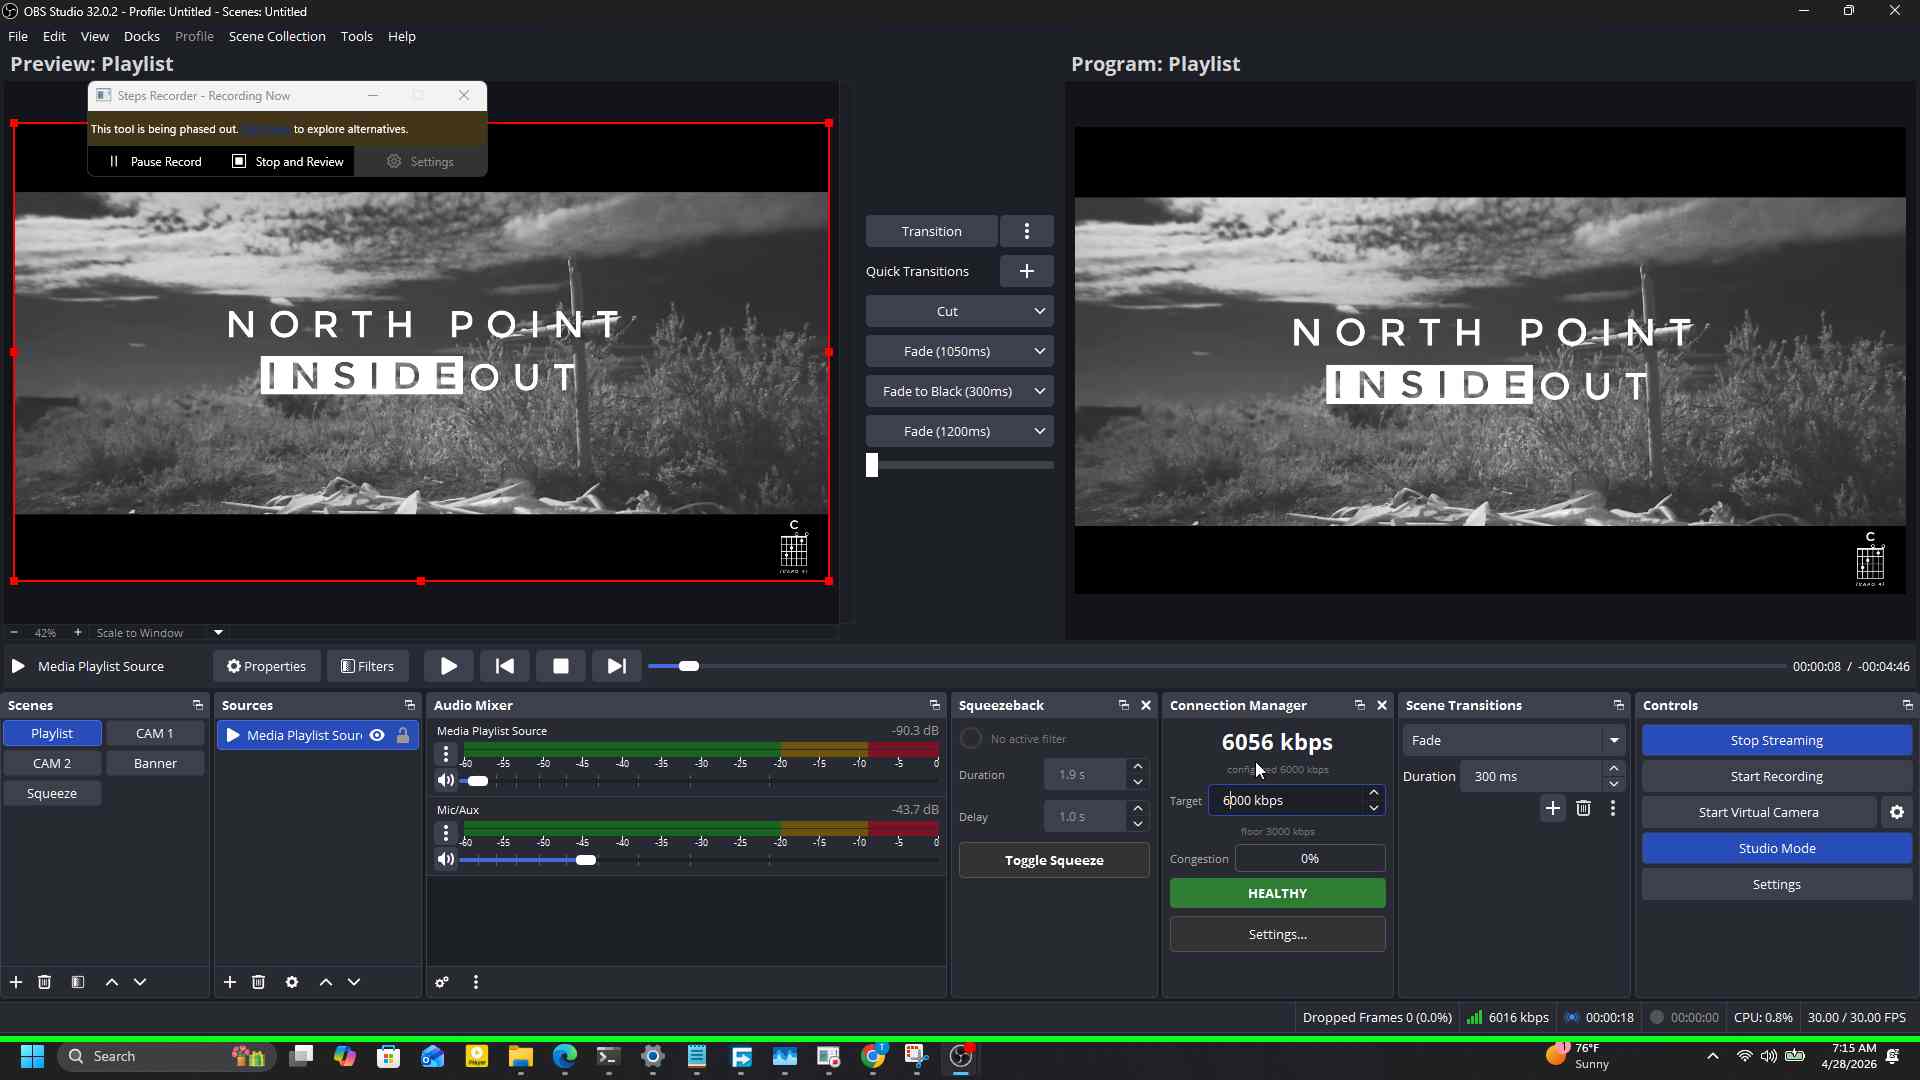
- Live bitrate is the big number at the top. It samples every second from the streaming output’s byte counter, so it matches the value OBS shows in its own status bar.
- Configured kbps sits underneath in small grey text. This is the bitrate the encoder is currently asking for. It diverges from the live number whenever the network is dropping packets.
- Target spinbox is editable while the stream is live. Whatever you set here becomes the ceiling that step-up recovers to.
- Floor is the lowest bitrate Connection Manager will step down to. It is the larger of your configured Lower limit or 50 percent of the target, whichever is higher.
- Congestion bar is a 0 to 100 percent meter. Green under 50, orange between 50 and 80, red above 80.
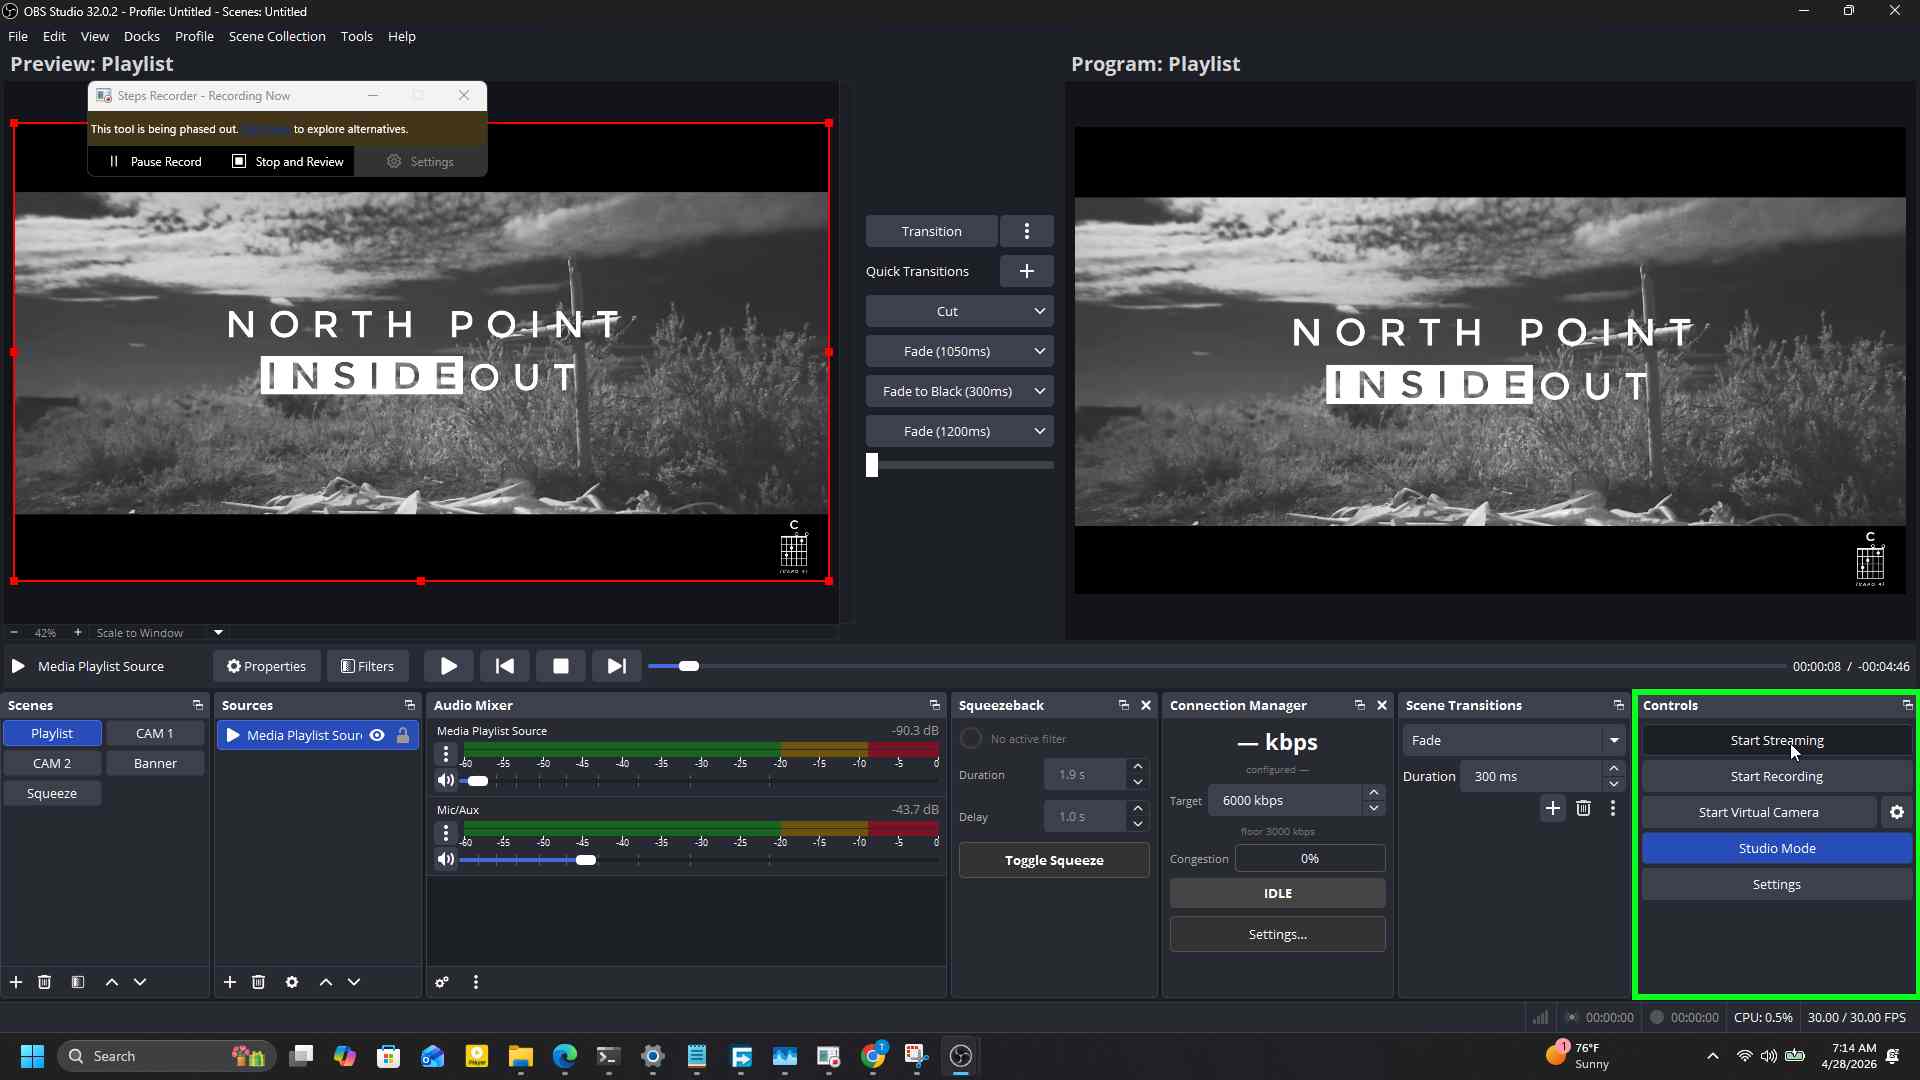
- State badge shows IDLE, HEALTHY, DEGRADING, AT_FLOOR, or BREAKING.
- Settings button opens the configuration dialog.
First-run walkthrough
The screenshots below were captured during a real first-run session. Follow along with your own stream key to see the dock populate.
1. Open OBS
Launch OBS Studio. The plugin loads automatically once installed; no extra steps in the Tools menu are needed to start using it.
2. Open the Docks menu
Click Docks in the menu bar.

3. Enable the Connection Manager dock
Click Connection Manager in the dropdown. It appears alongside the built-in OBS panels.
4. Start streaming
The dock only shows live numbers when an output is active. Click Start Streaming.
5. Watch live bitrate populate
Within a second of stream-start the dock’s big number lights up with measured kbps. The configured target underneath says what the encoder is asking for.
6. Watch it move
Throughput is sampled over a 1-second window with light EMA smoothing. You will see it drift a few hundred kbps either side of the configured rate; that is normal.

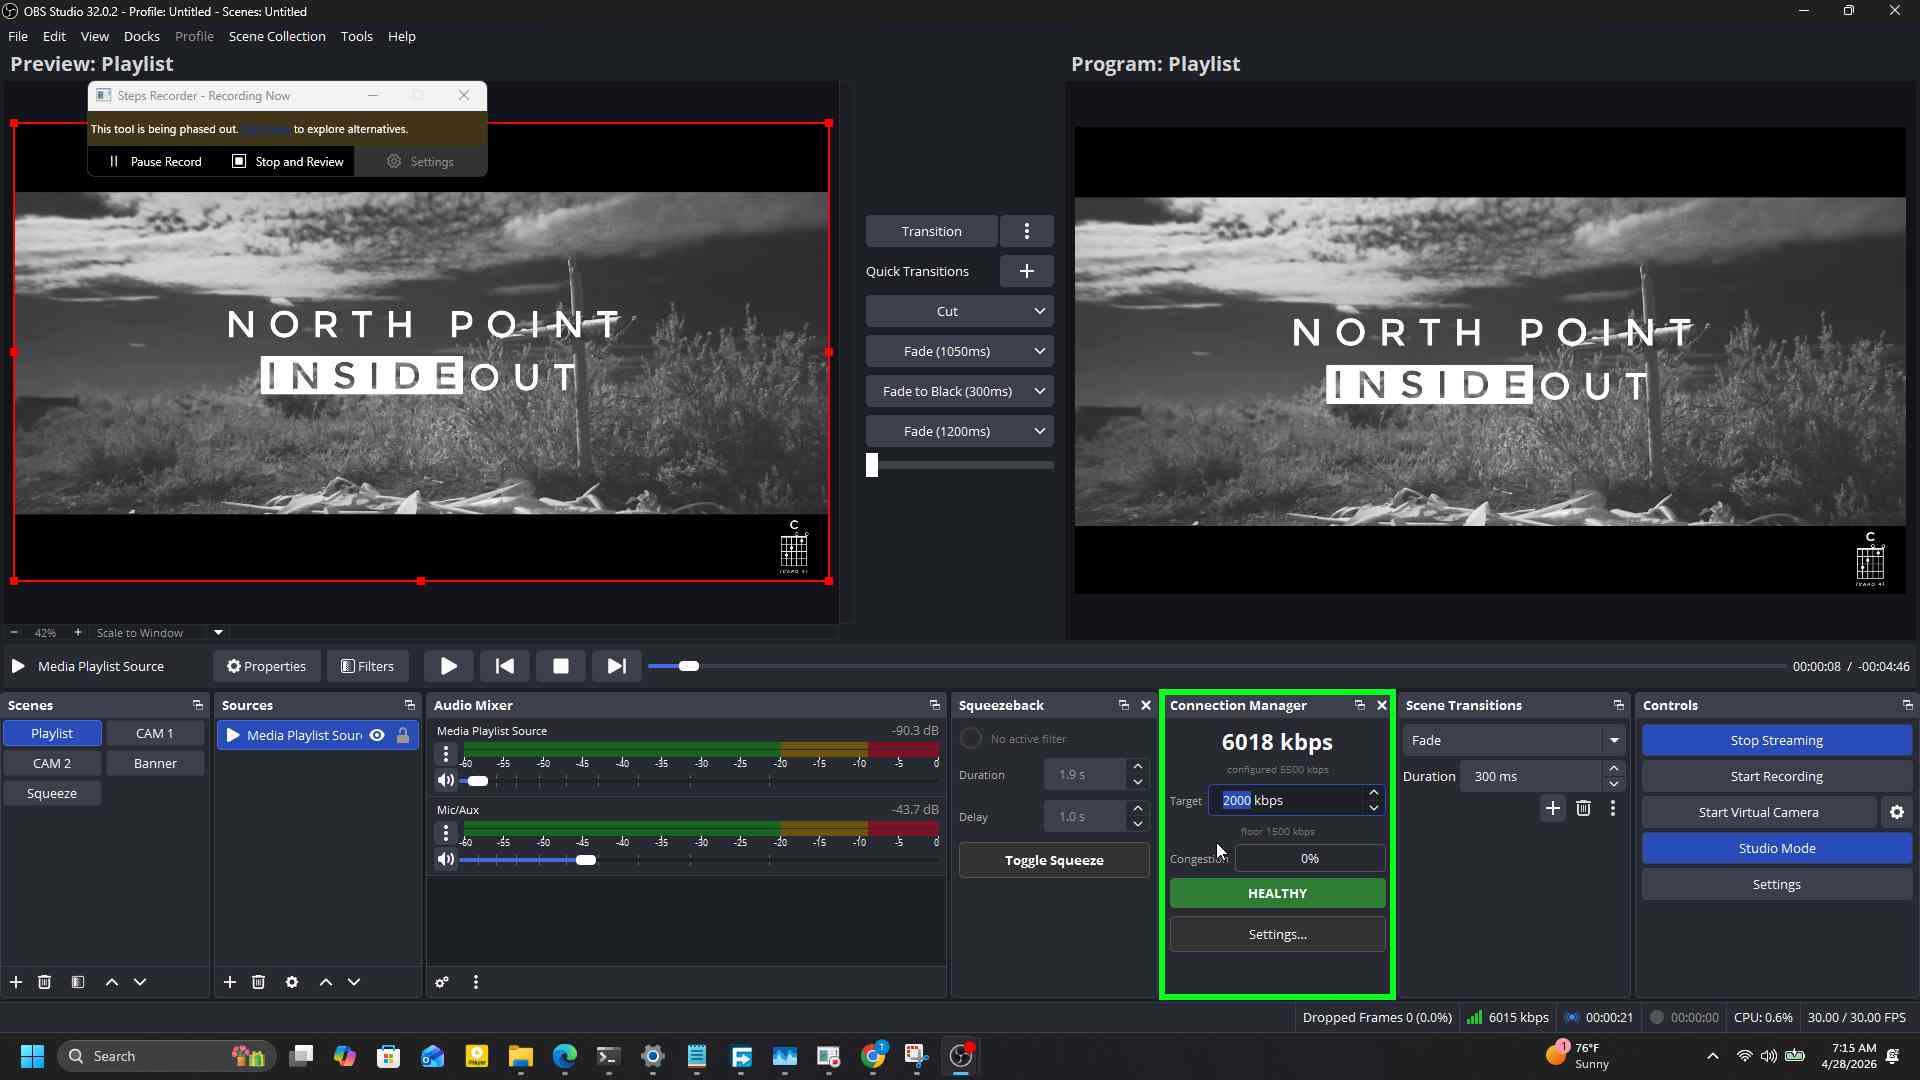
7. Edit the live target
Click the Target spinbox. Type a new value. Press Enter or tab away to commit. The new ceiling is honored on the next monitor tick, and it persists to the config file.

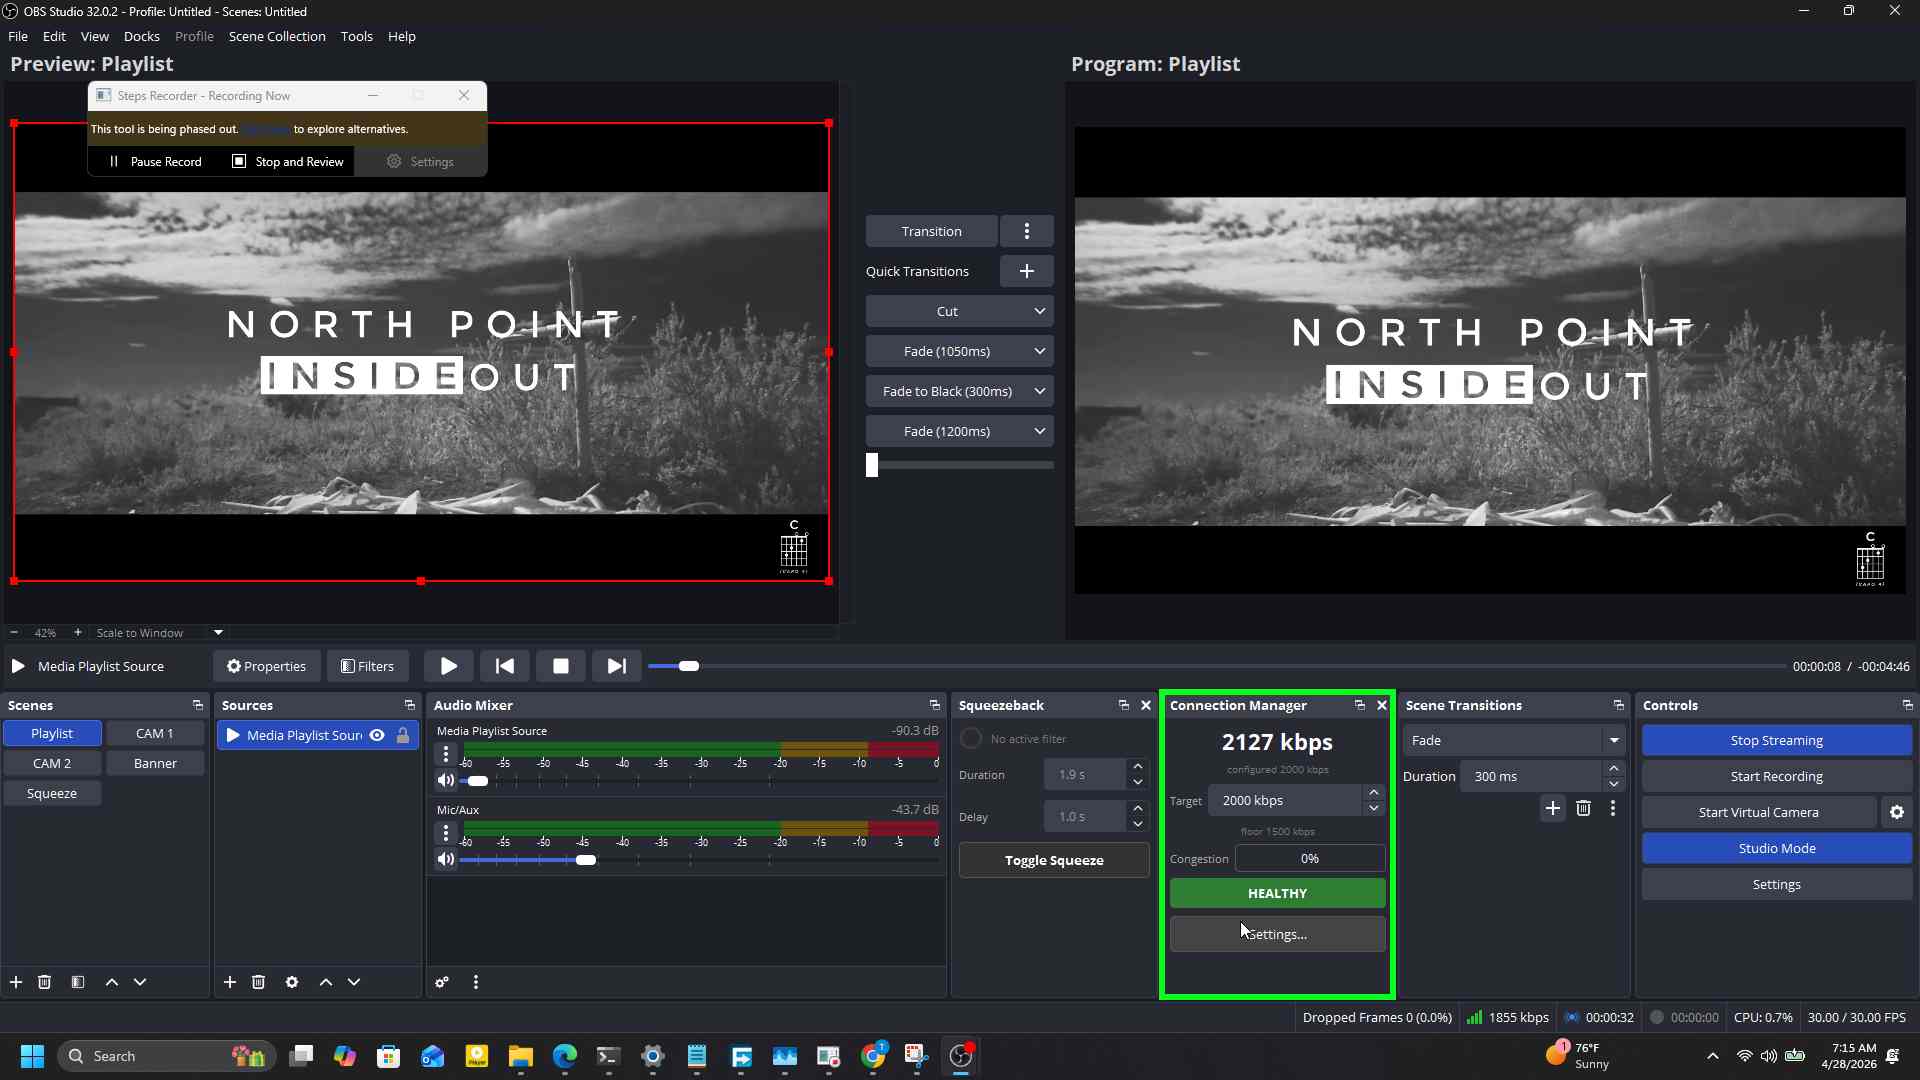
8. Confirm the new target
Backspace and Enter clears any in-progress edit. The displayed target reflects whatever value is now stored in settings.
9. Dock continues live tracking
Live bitrate keeps updating against the new ceiling.
10. Open Settings
For the three configurable thresholds, click Settings… at the bottom of the dock.
11. Adjust the lower limit
The Settings dialog has three rows: Upper limit, Lower limit, and Step size. Drag the Lower limit spinner to set the minimum bitrate the plugin will step down to.

12. Release the drag
The new value is shown in the spinner. It is not saved until you click Save.

13. Type a precise value
You can also type the value directly. Tab or click out to commit it within the dialog.
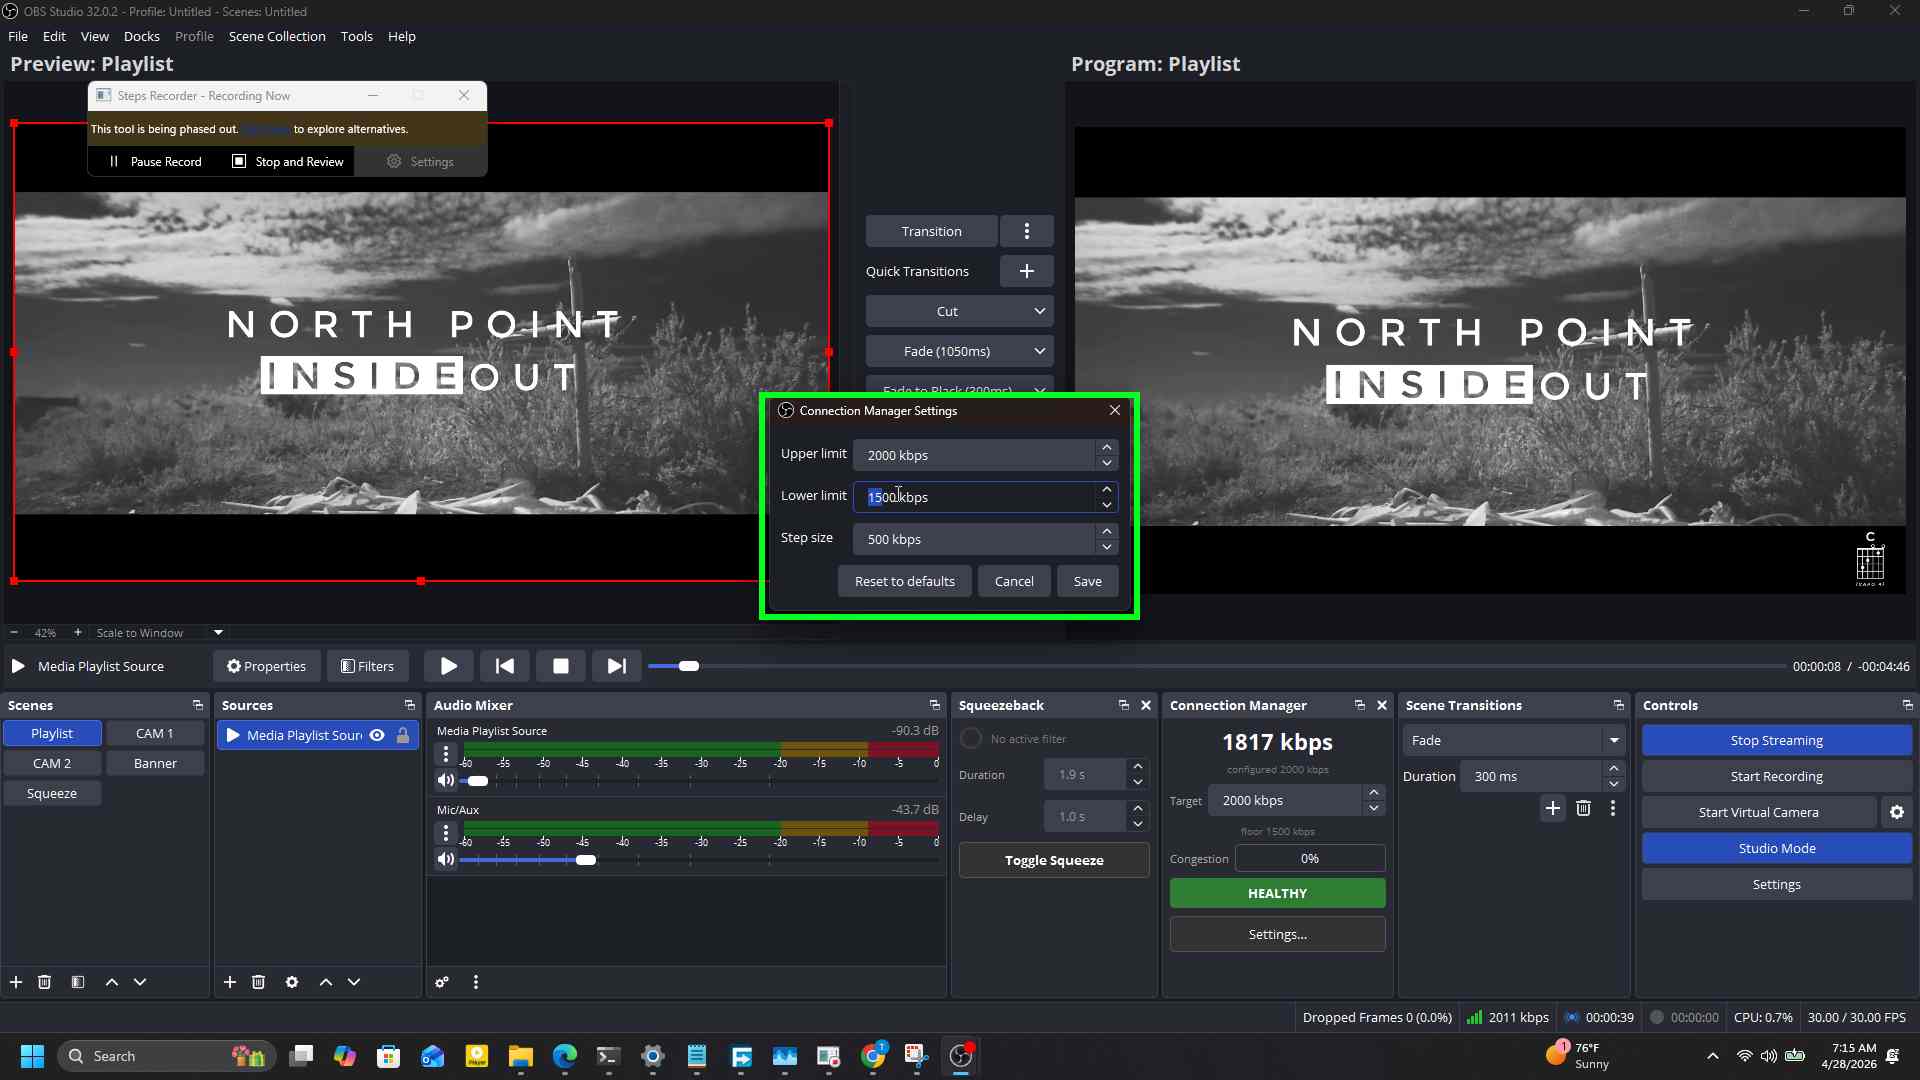
14. Save
Click Save. The dialog closes.

15. Back to the dock
The dock now reflects the new floor in the small text under the target.

The three settings
Upper limit is the ceiling the plugin recovers to. After congestion clears and the recovery window has elapsed, step-up climbs back toward this value, never above. Default is 6000 kbps.
Lower limit is the absolute floor. Step-down stops here even if the network is still bad. The actual runtime floor is max(lower_limit, target * 0.5), so very high targets get a higher effective floor for free. Default is 1500 kbps.
Step size is how much each step-down or step-up moves the bitrate. Smaller steps are smoother but slower to react. Larger steps recover the picture faster but are more visible to viewers. Default is 1000 kbps.
Suggested defaults by upload speed
| Upload | Upper | Lower | Step |
|---|---|---|---|
| 5 Mbps DSL | 3500 | 1000 | 500 |
| 10 Mbps fibre | 6000 | 1500 | 1000 |
| 25 Mbps fibre | 8000 | 2500 | 1000 |
| 50 Mbps+ symmetric | 10000 | 3000 | 1500 |
These are starting points. Watch the session log for a few streams and adjust.
What happens during congestion
The state machine has five states. The story reads left to right:
- IDLE. Not streaming.
- HEALTHY. Streaming, congestion under 50 percent. Step-up considers climbing back to the target after a 5 second quiet window has elapsed and another 5 seconds since the last move.
- DEGRADING. Congestion over 50 percent but bitrate still above the floor. Step-down kicks in once per second until the bar comes back down or the floor is reached.
- AT_FLOOR. Bitrate is already at the floor and congestion is still elevated. The plugin holds; there is nowhere lower to go.
- BREAKING. Congestion stays above 95 percent at the floor for the full breaking-hold of 5 seconds. The red banner appears in the dock and a Windows toast fires once. Subsequent BREAKING re-entries are rate-limited so you do not get hammered with notifications.
When the network recovers, the path back is BREAKING -> AT_FLOOR -> DEGRADING -> HEALTHY, with the banner clearing as soon as state leaves BREAKING.
Tips
Test it before you need it. Use clumsy on Windows to throttle outbound traffic on port 1935 by 80 percent while streaming to a local RTMP sink. You can watch the full HEALTHY -> DEGRADING -> AT_FLOOR -> BREAKING transition without risking a real stream.
Widen the floor for unstable links. If your venue has a flaky connection that hovers around 60 percent congestion all night, set the Lower limit closer to half your Upper limit. The picture stays watchable instead of dropping to a slideshow.
Disable temporarily. Open Settings, hit Cancel; the values do not change. To turn the plugin off entirely without uninstalling, close the Connection Manager dock from its X button. The monitor thread stops responding to UI input but still runs in the background; it only takes effect when an output is attached, which happens at stream-start.
Troubleshooting
Encoder does not support live bitrate updates
Some encoders advertise OBS_ENCODER_CAP_DYN_BITRATE; some do not. NVENC, x264, and the Apple/AMD hardware encoders generally do. If your log shows caps: dyn=0, the plugin will still log decisions and emit alerts, but it cannot actually move the encoder bitrate. Switching to NVENC or x264 in Settings > Output is the fix.
Dock is not appearing in the menu
Restart OBS once after install. If it still does not show up, check the OBS log under %APPDATA%\obs-studio\logs\ for [cm] loaded and [cm] dock registered. Missing means the DLL did not load. Reinstall and verify obs-connection-manager.dll ended up in C:\Program Files\obs-studio\obs-plugins\64bit\.
Bitrate did not restore after I stopped streaming
It should. On stream-stop the plugin restores the encoder to whatever target was set when streaming started. If you see the encoder still at a stepped-down value, check the session log at %APPDATA%\obs-studio\plugin_config\obs-connection-manager\session.log for the streaming-stopped entry. Then verify in Settings > Output that the encoder bitrate field shows your normal value.